Sunday, September 26, 2010

The Sorcerer: Jedi Build

Level 20 True Neutral Elf Male
(20 Sorcerer)
Hit Points: 142
Spell Points: 2188
BAB: 10101520
Fortitude: 6
Reflex: 10
Will: 11

Starting Feat/Enhancement
Abilities Base Stats Modified Stats
(32 Point) (Level 1) (Level 20)
Strength 14 14
Dexterity 16 19
Constitution 10 10
Intelligence 8 8
Wisdom 8 8
Charisma 18 25

Level 1 (Sorcerer)
Feat: (Selected) Toughness
Spell (1): Mage Armor
Spell (1): Magic Missle
Enhancement: Aerenal Elf Melee Damage I
Enhancement: Sorcerer Force Manipulation I
Enhancement: Sorcerer Energy of the Dragonblooded I

Level 2 (Sorcerer)
Spell (1): Charm Person
Enhancement: Sorcerer Charisma I

Level 3 (Sorcerer)
Feat: (Selected) Weapon Finesse
Spell (1): Soundburst
Enhancement: Elven Dexterity I
Enhancement: Racial Toughness I
Enhancement: Sorcerer Lineage of Force I

Level 4 (Sorcerer)
Spell (2): Command Undead
Enhancement: Aerenal Elf Melee Attack I
Enhancement: Sorcerer Force Manipulation II
Enhancement: Sorcerer Subtle Spellcasting I

Level 5 (Sorcerer)
Spell (2): Daze Monster
Enhancement: Sorcerer Lineage of Deadly Force I
Enhancement: Sorcerer Energy of the Dragonblooded II

Level 6 (Sorcerer)
Feat: (Selected) Spell Focus: Enchantment
Spell (3): Chain Missiles
Enhancement: Sorcerer Charisma II

Level 7 (Sorcerer)
Spell (2): Invisibility
Spell (3): Suggestion
Enhancement: Sorcerer Lineage of Force II
Enhancement: Sorcerer Force Manipulation III

Level 8 (Sorcerer)
Spell (4): Force Missles
Enhancement: Aerenal Elf Melee Damage II

Level 9 (Sorcerer)
Feat: (Selected) Weapon Focus: Slashing Weapons
Spell (2): Resist Energy
Spell (3): Hold Person
Spell (4): Charm Monster
Enhancement: Sorcerer Lineage of Deadly Force II

Level 10 (Sorcerer)
Spell (5): Dominate Person
Enhancement: Sorcerer Force Manipulation IV

Level 11 (Sorcerer)
Spell (3): Haste
Spell (5): Mind Fog
Spell (4): Lesser Globe of Invulnerability

Level 12 (Sorcerer)
Feat: (Selected) Spell Focus: Evocation
Spell (6): True Seeing
Enhancement: Aerenal Elf Melee Attack II
Enhancement: Sorcerer Charisma III

Level 13 (Sorcerer)
Spell (5): Protection From Elements
Spell (4): Remove Curse
Spell (6): Mass Suggestion

Level 14 (Sorcerer)
Spell (7): Mass Invisibility
Enhancement: Sorcerer Lineage of Force III
Enhancement: Sorcerer Lineage of Deadly Force III

Level 15 (Sorcerer)
Feat: (Selected) Mental Toughness
Spell (5): Hold Monster
Spell (6): Greater Heroism
Spell (7): Mass Hold Person
Enhancement: Elven Dexterity II
Enhancement: Sorcerer Subtle Spellcasting II

Level 16 (Sorcerer)
Spell (8): Mass Charm Monster
Enhancement: Racial Toughness II
Enhancement: Sorcerer Energy of the Dragonblooded III

Level 17 (Sorcerer)
Spell (7): Power Word: Blind
Spell (8): Power Word: Stun

Level 18 (Sorcerer)
Feat: (Selected) Empower Spell
Spell (9): Dominate Monster
Enhancement: Sorcerer Energy of the Dragonblooded IV
Enhancement: Sorcerer Subtle Spellcasting III

Level 19 (Sorcerer)
Spell (8): Sunburst
Spell (9): Mass Hold Monster

Level 20 (Sorcerer)
Spell (9): Power Word: Kill
Enhancement: Sorcerer Bloodline of Power
Enhancement: Sorcerer Improved Empowering I
Enhancement: Sorcerer Concentration I
Enhancement: Sorcerer Subtle Spellcasting IV

Friday, August 27, 2010

The Vampire Quest

Name: The Church and the Cult
Rating: 9
Starts at NPC: Inquisitor Lightbringer
Starts in Zone: House Phiarlan

Level: 9
Quest Length: Long

Solo? No
Raid Quest? No
Patron Favor The Silver Flame

Location: Temple Of Vol

Related mob(s): Fire Mephit
Greater Fire Mephit
Ice Mephit

Base XP: 1679

Objectives: Defeat The Temple Guardian
Examine The Book On The Pedestal
Find And Consecrate The Altar Of Fernia
Find And Consecrate The Altar Of Risia
Defeat Adran Ir'Karsmore

Not Repeatable? No

Description: This quest is often referred to as The Vampire Quest in-game, because it was the first quest with a Vampire Boss, and was introduced with The Vault Of Night episode. It is given out by Inquisitor Lightbringer in House Phiarlan, and takes place in The Temple Of Vol.

There is a Lever in the first room that opens up the passage to the East. Inside is the Temple Guardian, who must be killed.

There Are Spike Traps In The Hallway To The East Of Here. Through That Hallway If You Head South, Past Another Trap, There Is A Rest Shrine Through A Hidden Door On The East. The Eastern Passageway From The Main Room North Of The Rest Shrine Is Also Heavily Trapped.

You Must Hit Levers Down The Ends Of The Various Branches To Unlock The Vampire.

The final Fight Is Very Challenging. Adran is a Vampire. The Vampire. And, as such, Will Cast A Number Of Spells Including Flamestrike, Blindness, and Domination. Due To The Flamestrike, You Should Keep From Being Bunched Up Too Closely. He Can Also Change Into Bat Or Wolf Form. While In Bat Form You Can Not Damage Him At All. Spell Damage Is The Key To Victory Here. When He Becomes Damagable You Must Nuke Like Mad. Wands Are Important Because It Can Be A Very Long Fight, He Will Regenerate While In Bat Form, Which Makes Him Very Hard To Kill.

Still, Should You Prove Victorious, His Chests Contain Some Unique Loot Which Is Worth The Ordeal.

Thursday, August 26, 2010

The Bard: Dwarven Warchanter

So much for the squishy Bard! There are many ways to spec out a Bard in DDO; so many choices, in fact, that it is very easy to make a mistake and really gimp yourself later in game, especially with a Bard who gets very few Feats to begin with. Bearing that in mind, we've done the hard work for you. We present the Warchanter, a Melee Bard that will level easily, and keep you from looking like a total noob while grouping.

The Warchanter
Bard Hybrid

Role
Party buffs, personal DPS, decent defense

Weakness
Few spell points, enough to buff, but not able to sling spells

Description
So, you want to kick ass as a Bard, do you? Do you like the idea of making your entire team perform better, while dishing out damage? Does standing back with the casters hoping not to get hit seem boring to you? Want to get up close and personal with your enemy while hearing the squishy sounds of your blade sinking deep into flesh and feeling their warm blood splatter across your face? Then the Warchanter is the class for you!

As a Warchanter you will be one of the best at amplifying your party's melee damage output. You will be a fairly capable fighter in your own right, and will also be self-sufficient.

This Warchanter is a Bard/ Fighter/ Rogue build. I know, I know... another multi-class... but this makes the Bard an in-your-face battler. You will focus on improving your fighting capabilities, as well as that of your party, but will also be able to mesmerize your enemies and use almost every item in the game like other Bards. It is designed to get you very high DPS, and near max songs.


Race
Dwarf (mainly for save bonuses)

Alignment
True Neutral (avoids all alignment damage), Chaotic Good (if you want Chaos weapons), Lawful Good (for Law weapons)

Starting Abilities
28 Point Build

STR16
DEX16
CON12
CHA12
INT8
WIS8


Advancement by Level

LEVEL CLASS FEAT
1 ROGUE TOUGHNESS
2 FIGHTER TWO WEAPON FIGHTING
3 BARD FOCUS: SLASHING
4 BARD
5 BARD
6 BARD OVERSIZED TWO WEAPON FIGHTING
7 ROGUE
8 FIGHTER IMPROVED TWO WEAPON FIGHTING
9 BARD POWER ATTACK
10 BARD
11 BARD
12 BARD IMPROVED CRIT: SLASHING
13 BARD
14 BARD
15 BARD GREATER TWO WEAPON FIGHTING
16 BARD
17 BARD
18 BARD EXTEND SPELL
19 BARD
20 ROGUE


At level 20 this will give you a final build of Bard 15/Fighter 2/Rogue 3. Always take Rogue at first level if you are going to take any Rogue levels at all. It gives you a lot more skill points to spend than if you take it later on.

Spells (in order taken by spell level)

Level 1: Cure Light Wounds, Expeditious Retreat, Focusing Chant, Remove Fear, Detect Secret Doors
Level 2: Cure Moderate Wounds, Rage, Blur, Heroism
Level 3: Haste, Displacement, Cure Serious Wounds, Remove Curse
Level 4: Freedom of Movement, Dimensional Door, Cure Critical Wounds, Break Enchantment
Level 5: Greater Heroism, Mass Cure Light, Greater Dispel, Shadow Walk

Skills

Perform: Keep maxed out (for Bard songs)
Use Magic Device: Keep maxed out (for wand and scroll use, and ignoring requirements on gear)
Open Locks: Keep at half ranks, and you can catch up on rogue levels (at half can still open most locks)
Balance: Put a few left over points here (helps you get up faster once knocked down)
Jump: Put a few left over points here

Enhancements
Take them when you can, at level 20 you should end up with the following.

Bard Warchanter I (availabe at level 10)
Dwarven Toughness III
Fighter STR I
Rogue DEX I
Dwarf CON I
Bard CHA II
Dwarven Axe Damage II
Dwarven Armor Mastery II
Dwarven spell Resist III
Dwarven Axe Attack II
Bard Lingering Song II
Bard Song Magic II
Bard Inspired Damage III
Bard Energy of Music II
Bard Wand and Scroll Mastery I
Bard Inspired Attack III
Bard Inspired Bravery II
Rogue Sneak Attack Training I
Fighter Haste Boost I
Fighter Toughness I

Summary
This build captures the spirit of the Warchanter. You are a kick ass Bard that can solo very well, but you're also wanted by groups for all the benefits you bring. In many groups you can be near the top of the kill list, and your songs are something that every party member will love.

Wednesday, August 4, 2010

Sneaking Up On Level 12

Congratulations to everyone on getting the Family avatars ["Famatars?"] up to Level 6! Now, we just have to figure out how to be online at the same time...

The Guild is about to reach Level 12, and with it comes another level of treats: discounted hirelings. I'm not sure if the Guild Hirelings are any smarter than the Normal Hirelings, but here's to hoping!

Anyone find anything cool with the Tiny Guild Gems? The Power Gem gives you +20 spell points, or +40 if you're a scorcerer [heh, heh]. And the elemental gems like spark and corrosion give an additional point of elemental damage, for that extra umph. So far, I've only been able to add the gems at the Machine in Marketplace. They last for six hours of gameplay and you can't change it out until the previous one's time is up--so get used to the one you install 'cause you're going to be seeing it for a while.

Here's to the Quest for Level 20!

Thursday, June 3, 2010

The Ranger

You knew it was coming and here it is. Again these are my personal views and opinions on the class. A couple things to remember, I'm personally and RP'er and an elf lover and my builds normally reflect this. I love Rangers, I think it is a great class in DDO. I break the typical Ranger classed characters into four archetypes. I know there can be more, but these are the four most prevalent. I will update this post as I get comments and suggestions.

Ranger Types
The Ranger class is one of the most versatile in DDO. You get a good selection of skills, solid class abilities and bonus feats, the best base attack bonus (BAB) progression, and great Fortitude and Reflex save progressions. The Ranger class lends itself very well to multiclassing. Two levels in you get two free feats that are useful for any type of combatant. Rangers also get favored enemies, animal empathy, and divine spellcasting ability with just the first level. So with all this stuff you get in the first two levels, how can there possibly be anything left in the last eight? Well you get more favored enemies and higher bonuses for your previous ones, you actually get spellpoints to cast those Ranger spells, another two free feats at level 6, and evasion at level 9. If you look beyond what DDO has right now, there are more free feats at levels 11, more favored enemies, and boosts to stealth abilities. So Rangers can be mostly broken down into four categories. The Pure Ranger (Rgr10), the Archer Ranger (Rgr2/Ftr8), the Two-Weapon Fighting Ranger (Rgr6/Ftr4), and the Stealth Utility Ranger (Rgr7/Rog3).


The Pure Ranger
The pure Ranger takes every level in Ranger and loves every minute of it. Against favored enemies the bonus damage starts to get insane. Without dipping into other classes, the Pure Ranger nets three favored enemies, evasion, four free feats, wild empathy, and some divine spells.

Ability Scores
For the Pure Ranger there’s a few important abilites. Wisdom controls the classes spellcasting and poor Will saves, Dexterity adds to the ranged attack bonus, Reflex Saves, and Armor Class, Strength adds to the melee attack bonus and damage at range and in melee. Intelligence can add a few extra skills points per level to the base six. Constitution can keep a Ranger in melee with additional hitpoints and bonuses to an already good Fortitude save. Charisma controls the Wild Empathy class ability.

Feat Selection
A pure Ranger nets four free feats and may want to use the character level feats to improve one of the combat styles. Point Blank Shot, Dodge, Mobility, and Shot on the Run can take you up to ninth level. Weapon Focus, Weapon Finesse, Dodge, and Improved Critical can help with the melee aspect.

Skill Selection
A pure Ranger will have around 6 skills he can keep maxed at each level. Move Silently, Search, Hide, Spot, and Listen take up five of these. Use Magic Device, Tumble, or Concentration are all solid possibilites for the last slot.

Enhancements Selection
Pure Rangers can get the best enhancements in the Ranger class. 50 bonus spellpoints, bonuses to attack against favored enemies, increased healing, bonuses to Dexterity, and skills. Really the pure Ranger can use any of these to add some focus to their character and make all the multiclass Rangers jealous.

Build-At-A-Glance Table

Elf Ranger10 – Str 14 Dex 23 Con 10 Int 10 Wis 14 Cha 8
Starting scores - Str 14 Dex 18 Con 10 Int 10 Wis 14 Cha 8

Rgr1 – Favored Enemy (Undead), Wild Empathy, Dodge
Rgr2 – Combat Style (Rapid Shot, Two-Weapon Fighting)
Rgr3 – Mobility or Weapon Focus (piercing)
Rgr4 – Ability Increase (Dexterity 19)
Rgr5 – Favored Enemy (Giants)
Rgr6 – Improved Combat Style (Manyshot, Improved Two-Weapon Fighting), Point Blank Shot or Weapon Finesse
Rgr7 -
Rgr8 – Ability Increase (Dexterity 20)
Rgr9 – Evasion, Shot on the Run or Improved Critical (piercing)
Rgr10 – Favored Enemy (Dragon)

Enhancements: Skill Stealth V, Ranger’s Dexterity III, Favored Attack III, Elf Dexterity II
Skills: Concentration +13 (13), Hide +26 (13), Listen +17 (13), Move Silently +26 (13), Search +15 (13), Spot +17 (13).

Archer Ranger
The archer Ranger is a multiclass Ranger/Fighter. Taking the free archery feats from the Ranger and using the Fighter’s bonus feats to improve accuracy and damage. The archer Ranger has fewer skills but more feats. Enhancements aren’t as good as a Pure, but they are more diverse.

Ability Scores
The archer Ranger focuses on Strength and Dexterity. He is built for damage and more damage but at range. Constitution is of medium importance, extra hit points are nice, making Fortitude saves are a good bonus. The mental stats really have no bearing on combat. Drop points in them to try and keep them at ten, but don’t sacrifice your physical scores too much for it.

Feat Selection
Anything and everything that can help an Archer hit more or do more damage is needed. Weapon Focus (ranged), Weapon Specialization (ranged), Improved Critical (ranged), Point Blank Shot, Dodge, Mobility, Shot on the Run. This build is all about the feats and you need to pick up as many as you can.

Skill Selection
Secondary to the feats, skills can be somewhat important. Invest in Balance, Jump, and Tumble. Use your skills to perch and fire from a safe place. Sure you can take or hit or two, but that -4 to AC while holding a bow and in melee combat really hurts.

Enhancement Selection
Elves are solid choices for their ranged damage enhancement. Pickup Ranger’s Dexterity, the Fighter’s Strength, the Elven Dexterity and the Elven Ranged Damage.

Build-At-A-Glance Table

Elf Ranger2/Fighter8 – Str 18 Dex 25 Con 10 Int 8 Wis 8 Cha 8
Starting Scores - Str 15 Dex 20 Con 10 Int 8 Wis 8 Cha 8

Rgr1 – Favored Enemy (Giant), Wild Empathy, Point Blank Shot
Rgr2 – Two-Weapon Fighting, Rapid Shot
Ftr1 – Dodge, Mobility
Ftr2 – Shot on the Run, Ability Increase (Dexterity 21)
Ftr3 -
Ftr4 – Weapon Focus (ranged), Weapon Specialization (ranged)
Ftr5 -
Ftr6 – Improved Critical (ranged) Ability Increase (Dexterity 22)
Ftr7 – Manyshot
Ftr8 – Great Weapon Focus (ranged)

Enhancements: Ranger’s Dexterity I, Fighter’s Strength III, Elven Dexterity II, Elven Ranged Damage II
Skills: Hide +12 (5), Jump +12 (8), Move Silently +12 (5), Spot +10 (11), Tumble +10 (3).


TWF Ranger
The Two-Weapon Fighting Ranger takes advantage of the bonus feats the Ranger provides to be a melee combat damage machine. Strutting around in full-plate armor he is as much a tank as anyone else in the game.

Ability Scores
The TWF Ranger focuses on Strength and Constitution. In melee combat, Strength controls everything and needs to be as high as possible. A solid Constitution keeps the TWF Ranger upright in the middle of the fight. Dexterity should be a 13 to get Dodge but in full-plate there’s no point going any higher. Skills and spells are not at all important and the mental stats can be sacrificed for the physical ones.

Feat Selection
With Two-Weapon Fighting and Improved Two-Weapon Fighting for free, the TWF Ranger can focus on improving his damage in melee. Weapon Focus, Weapon Specialization are a must. Dodge increases the character’s AC a bit more. Other feats should be spent on two-weapon combat feats.

Skill Selection
Skills aren’t so important to the TWF Ranger. Sure, tumble is nice, spot and search can be useful at times, but really this Ranger is all about combat all the time and wants to be in the center of it.

Enhancement Selection
Fighter’s Dodge and Fighter’s Strength are musts. The rest are really fluid. If you’re a human pick up the Human Strength, the Action Boosts or the Ranger’s Favored Enemy enhancements aren’t bad pickups either.

Build-At-A-Glance
Dwarf Ranger6/Fighter4 – Str 21, Dex 13, Con 18, Int 8, Wis 8, Cha 7
Starting Scores - Str 18 Dex 13 Con 16 Int 8 Wis 8 Cha 9

Rgr1 – Weapon Focus (slashing), Favored Enemy (giants)
Rgr2 – Combat Style (Rapid Shot, Two-Weapon Fighting)
Ftr1 – Dodge, Two-Weapon Defense
Rgr3 – Ability Increase (Strength 19)
Ftr2 – Two-Weapon Blocking
Ftr3 – Power Attack
Rgr4 -
Ftr4 – Weapon Specialization (slashing), Ability Increase (Strength 20)
Rgr5 – Improved Critical (slashing), Favored Enemy (dragon)
Rgr6 – Improved Combat Style (Manyshot, Improved Two-Weapon Fighting)

Enhancements: Fighter’s Dodge, Fighter’s Strength I, Axe Damage II, Dwarven Constitution II
Skills: Heal +8 (9), Intimidate +2 (4.5), Jump +18 (13), Listen +8 (9), Spot +8 (9).

Stealth Utility Ranger
The Stealth Utility Ranger uses his Ranger combat ability in conjunction with sneak attacks. A very skills based multiclass this character does a lot outside of combat too. This is the build I personally use and am most familiar with.

Ability Scores
As a skills class, Intelligence is important. A decent Wisdom is necessary to cast spells. Strength and Dexterity control how well this character performs in combat and with the majority of his skills. Constitution is nice for additional hit points but not really needed. Charisma is once again a dump stat.

Feat Selection
There’s two routes you can go with this character. Focusing more on combat side or more on the skills side. Either is very valid but with six levels in Ranger the feats tend to be more in-tune with combat. Point Blank Shot, Dodge, Mobility, and Shot on the Run is a good progression. For a more skills oriented way, go with Nimble Fingers, Dodge, Mobility and Skill Focus (Disable Device)

Skill Selection
With the highest and second highest amount of skill points per level, this multiclass can spread the points around. Stealth, recon, and disabling skills are important. Drop points into Disable Device Hide, Listen Move Silently, Open Lock, Search, and Spot. Tumble keeps you out of harm’s way.

Enhancement Selection
Ranger’s Action Boost is a must have. The bonus it gives to all your skills is very important. If you’re an elf you can pick up the Dexterity enhancements from your two classes and your racial.

Build-At-A-Glance

Elf Ranger7/Rogue3 – Str 16 Dex 22 Con 8 Int 14 Wis 12 Cha 8
Starting Scores - Str 15 Dex 17 Con 8 Int 14 Wis 12 Cha 8

Rog1 – Dodge, Sneak Attack +1d6
Rgr1 – Favored Enemy (Undead), Wild Empathy
Rgr2 – Mobility, Combat Style (Rapid Shot, Two-Weapon Fighting)
Rgr3 – Ability Increase (Strength 16)
Rog2 - Evasion
Rgr4 - Point Blank Shot
Rgr5 – Favored Enemy (Giants)
Rgr6 – Improved Combat Style (Manyshot, Improved Two-Weapon Fighting), Ability Increase (Dexterity 18)
Rgr7 – Shot on the Run
Rog3 – Sneak Attack +2d6

Enhancements: Ranger Action Boost III, Skill Ingenuity II, Ranger’s Dexterity II, Elven Dexterity II.
Skills: Bluff +3 (4), Concentration +6 (7), Diplomacy +3 (4), Disable Device +19 (13), Heal +8 (7), Hide +18 (12), Listen +9 (8), Move Silently +18 (12), Open Lock +23 (13), Search +15 (13), Spot +14 (13), Tumble +10 (4).

Comment, criticisms, and suggestions are more than welcome.

Wednesday, March 17, 2010

Dragon Mark Quest

This quest allows you to obtain your dragonmark. Speak to Lockania outside of the dungeon, and then walk inside and speak to her again.

She will give you a series of questions. We would like to compile a list of all of the proper answers to these.

Some of the questions and answers of this quest:

Q. Which now-lost mark appeared with the mark of Shadow?
A. Mark of Death

Q. Which House is the greatest military power?
A. House Deneith

Q. What House created the lightning vail and warforged?
A. House Cannith

Q. Who operates the Courier's Guild and lightning rail?
A. House Orien

Q. What two Guilds are operated b House Deneith?
A. Defenders and Blademarks

Q. Which race wears the Mark of Healing?
A. Halflings

Q. What is House Phiarlan's secret business?
A. Espionage

Q. What power does the Mark of Passage grant?
A. Teleport

Q. House Kundarak is responsible for what service?
A. Banking

Q: Where did House Jorasco finally settle?
A: Karnath

Q: What spell-like ability does the Greater Mark of Passage grant
A: Teleport

Q: When did the Mark of Warding Appear, and amongst whom?
A: 2500 years ago, Dwarves

Q: Which skill does the Mark of Making give?
A: Repairing

Tuesday, January 26, 2010

The Wish List

This is the "I would really like to have one of these" list. The list we use to look out for items that our teammates are looking for. The below list is just a start. Let me know who is looking for what, and we'll get it updated. We all play at different times, and come across different things, so it just seemed logical to have a central spot for the wish list.

If you find an item, and want to pass it along to them, hand it off in-game or email it at the Mailbox. Remember that you may ask for something in return, too! Just be sure to let me know, so we can take it off the Wish List.

Vladivostok.
NG Human Level 3 Rogue.
+3 Shortswords.

Drakkenhaus.
NG Human Level 5 Cleric/1 Fighter/1 Sorcerer.
+2 Sacred platemail.
Power items.
Holy warhammer.

Drakkenblade.
TN Elf Level 4 Fighter/3 Wizard [Spellsword].
+2 Fearsome platemail.
+2 Mithral platemail.

The Tears of Dhakaan

This dungeon takes you to the Arzag-Khor Sewer. This dungeon is populated by high level hobgoblins and is rather difficult. The difficulty comes primarily from the spellcasters, who will cast a nasty cloud spell which can be the death of a party. You can not cast spells while within the clouds, but you can use wands.

Starts at NPC:Kamat Thaar
Starts in Zone:House Phiarlan
Level7
Quest LengthVery Long

Map of Arzaq-Khor. You probably need a full party for this one. Hirelings can work, but they're just no substitute for a real player, no matter what the Hirelings Union Local 42 tells you. The shrines are behind locked doors, and there are a few traps -- bring someone with some rogue levels.

Some of the shards are hidden behind doors which need a high attribute score (20+). You'll need at least one person with 20 strength, one with 20 intelligence, one with 20 wisdom. Buffs are fine; hirelings with the appropriate scores can open these doors, though our wizard hireling was a pain in the ass about opening his. If your hireling doesn't want to trigger a door opening, then make sure s/he is standing *right* next to it before you give the command to use it.

One shard is hidden through an underwater tunnel at the intersection of three corridors. It's a middling swim -- people in light or medium armor can probably make it without trouble. People in heavy armor may take a little damage unless you can cast waterbreathing on them somehow.

One shard is hidden above the waterfall in the hobgoblin village - you'll need to jump across some fairly narrow ledges to the left as you enter the village. Featherfall helps you make the jumps. There's a clay golem waiting above the waterfall -- acid damage heals him, and he's immune or resistant to basically everything else. You'll need an adamantine or metalline weapon, preferably a bludgeoning weapon, to bypass his damage reduction.

The quest is very long, but the loot and the XP are excellent--5,000+XP. It's also pretty fun if you have a full party of real players. Trying to solo it or do it with only 2-3 people will likely prove frustrating.

Thursday, January 14, 2010

Small Ingredients Bag

Is your backpack overflowing with all the little random things the denizens of Stormreach have asked you for? Are you beginning to think that gems are not really shiny? When you see an executioner beetle, do you want to step on it instead of capturing it for Mantakhan? Do you have kobold prayer beads falling out of your backpack? The top minds of Stormreach have been toiling day and night to relieve adventurers of their overflowing packs of gems and collectibles.

What did Stormreach's finest minds come up with? Bags! Bags that can be put inside of backpacks! These bags have amazing organizational qualities! The Stormreach Tailors Union bring you two types of bags, one for collectibles and one for gems. Adventurers like shiny things, and what shines more then gems? So, why are so many gems left lying on the sewer floors? No more! Gems can now be placed into gem bags and then sold to vendors in a snap by telling vendors to go ahead and take all the gems they can find in player's packs, including their new gem bags. Gem bags are available in three sizes and each bag only takes up one space in your backpack!

Speak with Jeanselme Brucetius within the Twleve Enclave off the edge of the Marketplace. He will give you a small ingredients bag. Open it, select autogather, and then hit the Gather button. You will see your dragonshards, and various other space-taker-uppers pop from your main packs to this little one-space bag. Very cool.

If you pop up the picture, you should get a good idea of where Jeanselme Brucetius stands in the Twelve Enclave map. Good hunting!

Monday, January 11, 2010

Caverns of Korromar

The Caverns of Korromar quest is given by Ulfgar d'Kundarak in House Kundarak, and is an oft-avoided quest. The reason for this is that it takes longer, and is more difficult than many other quests this level, yet gives less experience. It makes up for that somewhat with a good number of optional experience points, but not enough to increase it's popularly.

Starts at NPC:Ulfgar d'Kundarak
Starts in Zone:House Kundarak
Level8
Quest LengthLong

There are several mini-zones in Korromar and the denizens are mostly undead and ooze, with the occasional Demon. Your goal is to work your way through the various dig sites before finding and slaying R'zzix the beholder. The major reason it bites is that each of the mini-zones is in fact a separate area, but once your in it your map doesn't track your progress--as the map is only tracking your outside movement. Worthless. If you lose track of your party, there is no map-assisted regrouping. You're either resorting to good old-fashioned rally points and infantry tactics, or you /death and all regroup at the front door--chances are the party is all deceased by the time you can find them again anyway.

The first of the mini-dungeons is marked as the Korromar sewers near the entrance. It is inhabited by large numbers of Ooze and Jellies, so bring disposable weapons.

When you reach the exit of these sewers you must make sure that you are all ready for a fight, and zone up together. The moment you port up you will be attacked by a huge number of undead, including wraiths, spectres, wights, and zombies. After clearing them you can clear the optional experience boss of this area, Adorgar the Grudgebearer, a level 8 spectre.

After this you must search the dig sites for a journal. The southern dig site comes first. This dig site is populated by blackbones, and a nasty demon named Akuul.

Thursday, January 7, 2010

The Swiped Signet

This quest is handed out by Grinwhite at the Phoenix Tavern in the Marketplace. You must venture into the Quickfoot Hideout to retrieve his stolen Signet Brooch.

Map of Quickfoot Hideout. Before venturing into the Quickfoot area you must head over to Grudge's area and pull a lever (marked #2 on our map). This is past a number of Glass Spiders.

Starts at NPC:Grinwhite
Starts in Zone:Phoenix Tavern
Level3
Quest LengthLong

The Brooch can be found to the south of the entrance, past a large number of Quickfoot gang members.

After obtaining it you must escape to the exit. On the way you will be ambushed by Quinn the Quickfoot and his band of thugs.

There is a Wisdom Rune that will open a door after Quinn. Behind the door are an Ice, Air and Fire Mephit, so be forewarned.

For optional experience you can slay Grudge (#2 on map), Ironclaw, Duskspur (down at the bottom of way down) 5 thugs, or the Quickfoot raiding party (up a ladder across the water on the way down).

When you complete this quest you keep the Ruined Signet Brooch, in addition to the quest rewards. This brooch gives a bonus to your Heal skill.

Wednesday, January 6, 2010

The Pit

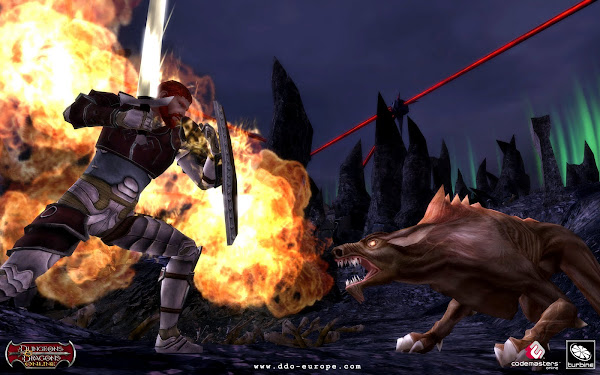
Everyone hates this place. To start with the multiple ramps and platforms is enough to get you jumbled, trying to guess which way to go next. Then on top of that there are the puzzles. I hate puzzles. Hopefully the information herein will be enough to take that painful edge off doing the quest.

Starts at NPC:Vargus d'Deneith
Starts in Zone:House Deneith
Level7
Quest LengthLong

Map to The Pit. Preparation is the key. Some of the more useful spells to have are Jump, and one of your casters with Resist Energy. Fire, Electricity and Acid are the key ones you’ll need throughout. Also everyone should have a feather fall item. Missing a jump while in the two central areas is deadly without it. Charm monster can also be quite helpful to keep the fire elementals at bay while you are throwing the switches.

To start off with when you zone in open your map up. The first thing to do is get your overall bearings. There is a large "square’ish" area with 2 circular pillars in the northwest and southeast of it. From here on out I'll refer to these as the North Pillar (NP) and South Pillar (SP).

Starting with the North Pillar it has 3 levels on the bottom of NP on it's north side there Main Control room is located there, along with a shrine. Moving up to the middle level of NP on the west side of it is the Bilge Control Room. And finally top of NP there are 2 rooms. On the east is the intake control room and on teh south is the security room.


The South Pillar (SP) only has 3 passages off of it. On the bottom East side are the 3 furnace rooms. On the middle South side of the SP is the Main Breaker Room. At the top of the SP on the north side of it is the Back up Generator.

The layout looks something like this.


OOOOOOOOOOOOOOOOOOOOO
O-----A---------------------O
O----XXX-------------------O
O-B-X----X-C---------------O
O----XXX-------------------O
O------D--------------------O
O----------------E----------O
O---------------XXX--------O
O--------------X----X-F----O
O---------------XXX--------O
O----------------G---------O
OOOOOOOOOOOOOOOOOOOO

A (Bottom Level) Main Control Room and Shrine
B (Middle Level) Bilge Control Room
C (Top Level) Intake Control Room
D (Top Level) Security Conrol Room
E (Top Level) Back up Generator
F (Bottom Level) Furnaces (Three total)
G (Middle Level) Main Breaker Control Room

Step One – Back up Generator
The First place you need to go is to the Back up Generator Room. To do this when you come in the entrance drop down to the platform right beneath you. Then follow it up. Careful as there is an acid trap at the top of this. A simple valve between the two jets turns it off. Once wind all the way up to the top of the South Pillar and enter into the room, there are various slimes and trogs for you to fight. Dispatch those. You then find a very complicated puzzle that you need to solve. There are 9 squares on the wall and 9 levers to pull. Each lever turns on designated squares to their opposite status.

-----------------ooooo-----------------
--X---X---X---ooooo--H---X---H---
-----------------ooooo-----------------
--X---X---X---ooooo--X---H---X---
-----------------ooooo-----------------
--X---X---X---ooooo--H---X---H---
-----------------ooooo-----------------

The X’s represent the levers in the room. Flip the 4 corners and the center lever. This should turn on all the lights.

Step 2 - Furnace Junction
Make your way down to the bottom east side of the South Pillar. This is the furnace area. Follow down the passage a short distance and it comes to a junction with 3 bridges. At this point the left bridge will be down. When you enter the left bridge room, it opens up with several trogs to fight. Pre-buffing with fire and acid resist as well as jump on whoever is going to go for the switch is helpful. The warlocks cast Melf’s and fireball. The fire elementals also cast fireball. Note: It’s not worth killing the fire elementals as they almost instantly respawn. Once you have killed the spawns at the bottom, there are several more up the ramps as you proceed. Also there are several valves that will turn off the acid and force traps. Make your way up to the top and flip the elemental control valve. This will put the elemental inside a protective force-field preventing him from casting on you and also completing the stage. There is a blue gem’d lever at the bottom, don’t turn that until you get to the secret are up top and open the shrine down below. Make sure you activate the blue gem’d wheel before you leave the area. You need these to get your muckdoom later!

Step 3 – Security System
Make you way back up to the top of the North Pillar. The security Center has a number of Trogs inside it as well. Kill these off and then procced to the wheels. Since everyone has a slightly different interpretation of how to read the symbols, I’ll try to describe them as best I can. No two wheels can have the same symbol, and there are only 6 that need to be set whith each wheel only having 6 symbols. There are also various placards on the wall with a coloured gem showing which coloured wheel is to be placed to which symbol in case my descriptions don’t quite work for you.

Bottom – Yellow Wheel “looks like a letter C with 2 horizontal lines through it”
Middle lower – Purple Wheel “looks like a letter E with a long horizontal line through it”
Middle upper – Blue Wheel “looks like and upside down “U” with a long vertical line through it”
Middle upper – Orange Wheel “Looks like a letter “H”
Middle upper – Green “Looks like the letters “AE” blended together
Top – Red Wheel “looks somewhat like a backwards “F”

Once you have all the wheels set to the appropriate symbols, throw the lever on the middle lower level by the purple wheel.

Once you complete this step all the force traps through out the middle area will no be armed and going off. There’s not much you can do other than stick together, use haste to get to your next location. Make sure you know where you are going and try to jump them as you go along.

Step 4 – Furnace Junction
Back to the furnace junction. This time it will be the straight ahead bridge to cross. Charming the fire elementals is quite helpful in order to keep them at bay while you are throwing the switches. Again, clear out the lower level of trogs, then have one person make their way to the top and throw the elemental control valve. Don’t forget to turn the blue gem’d wheel for your muckdoom later!

Step 5 – Main Breaker Room
Move to the middle level on the south side of the South Pillar. Having someone with evasion do this makes it a whole lot easier. Make sure they have lightning resist before they enter the room. Everyone else can wait outside and range kill any mobs that spawn in the room. Whoever is inside has to go and pull all the levers on all the columns to the down position. Once this is done they can pull the main lever at the back of the room. Have your cleric keep them healed as necessary. There is a treasure chest off to the left of this room, with a force trap triggered upon opening the chest. You can bypass the trap by moving to the side of the chest and edging forward until you can access the chest.

Step 6 – Main Control Room
Time to power up the main control room. Move to the north top of the North Pillar. Inside this room slimes like to chain spawn. There are 4 floor puzzles that need to be completed. These are fairly straight-forward puzzles to solve. Make sure you have a couple of tanks with muckbanes on slime kill duty while you are turning completing the puzzles. Once the puzzles are complete time to move on.

Step 7 – Re-start the bilge pumps
Make your way to the middle west side of the North Pillar. Access the bilge control room. There is a hidden room along here with a shrine in it. This part will feel very painless compared to everything else. At the end of this tunnel is one lever, give it a pull and you’re done.

Step 8 – Furnace Junction
Here we are back again at the furnaces. This time from the junction you want to take the right path. Inside here you need to split your party. Mobs will re-spawn on the bottom, so you want to leave at least a couple of people behind. Hopefully one is ranger or paladin with the ability to heal with wands. The rest of your party you want to send up top. Use the valves to catapult our party up. From there follow it around. Once you are almost to the top, one person will again have to stay behind on one of the wooden platforms to use the valve to send up the rest of your party. Once you flip the switch for the elemental control valve, if you go around that column and look across, you will see another small platform with a valve. Up inside there are 2 chests, but be aware 3 mobs spawn when you open those chests up. At best you can send up 2 people, so perhaps you want to drop a cloudkill then send someone to run up open the chest and drop back down while cloudkill does it’s work. I usually bypass these chests, it’s a real pain to get everyone up to them with all the control valves and mobs constantly re-spawning below. Don’t forget to turn the blue gem’d wheel for your muckdoom later!

Step 9 – Intake Control Room
Phew! You are almost done. You want to go to the top of the north pillar, and then across the wood bridge to the far side of it on the east side of the North Pillar. The easiest way to do this is have your wizard/Sorc cast cloudkill on the upper platforms before you trigger the room. I like to fight at the top of the steps with solid fog and cloudkill on the steps. As soon as you enter the middle of the room, it triggers part of the room to spawn. Send one person in, trigger it and move back to the top of the steps. Once both sides platforms are dead and the room, I like to trigger the switches on either side one at time. As you approach the switches it will trigger spawns. Move back to the steps and kill them. Once you have killed both sides, pull the switches one at a time. Pulling them also triggers spawns. Having done both switches move to the wheel and activate. This will complete the quest. Once everyone loots the chests, don’t finish out, you still might be able to grab yourself a muckdoom!

Step 10 – Muckdoom!
Make sure everyone has fire resist up. Drop down to the very bottom of the pit. The gated area should be open for you now. Kill off ay slimes here, then enter into the gated area. As you approach, the avatar will spawn. Kill him and loot his chest. If you are lucky you’ll get yourself a muckdoom.